Sentry
Integrating SessionStack with Sentry
Setting up the SessionStack plugin will add to your Sentry reports a visual recreation of the user behavior for each and every issue in your web app.
InfoThis tutorial assumes that you already have an account at Sentry with a configured project and Raven.js integrated into your application. If you still haven’t, check out how to get started with Sentry.
Creating a project
After signing up and logging in SessionStack click on "Add new" to create your first project:
Integration
After creating a new project you will be redirected to the Installation page. There you’ll see a small JavaScript snippet which has to be placed in the head element of your page. The snippet should look something like this:

And the basic SessionStack integration is ready.
An additional snippet is required for Sentry to associate each event with the current user session at the correct time:
<!-- Begin SessionStack-Sentry code -->
<script type="text/javascript">
SessionStack.getSessionId(function(sessionId) {
    Sentry.configureScope(scope => {
        scope.addEventProcessor(async event => {
            event.contexts = {
                sessionstack: {
                    session_id: sessionId,
                    timestamp: (new Date()).getTime()
                }
            };

            return event;
        });
    });
});
</script>
<!-- End SessionStack-Sentry code -->
NoteUse the snippet below if you're using Raven.js
<!-- Begin SessionStack-Sentry code -->
<script type="text/javascript">
    SessionStack.getSessionId(function(sessionId) {
        if (sessionId) {
            Raven.setDataCallback(function(data) {
                data.contexts = data.contexts || {};
                data.contexts.sessionstack = {
                    session_id: sessionId,
                    timestamp: (new Date()).getTime()
                };

                return data;
            });
        }
    });
</script>
<!-- End SessionStack-Sentry code -->
Finally, you’ll find the ID of the project in the General section of the Settings page:
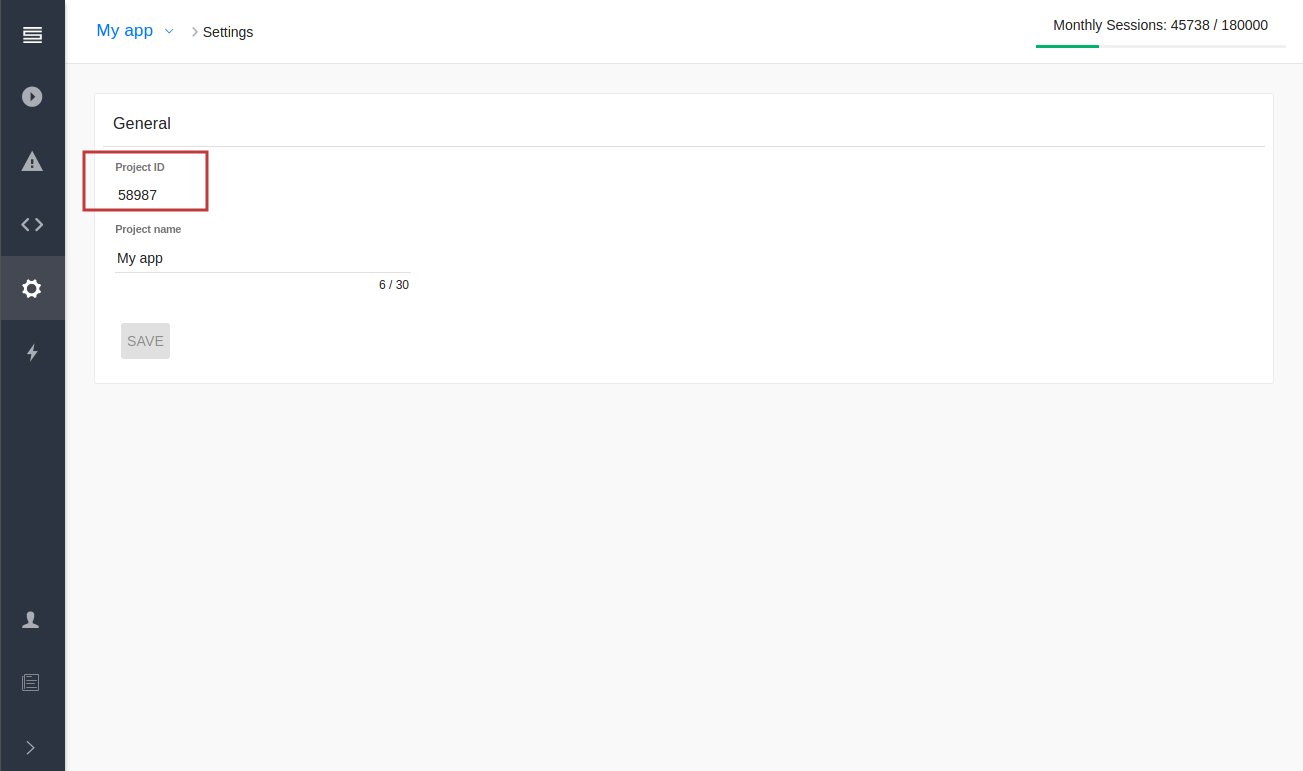
It will be used later when configuring the plugin in Sentry.
Creating an API token
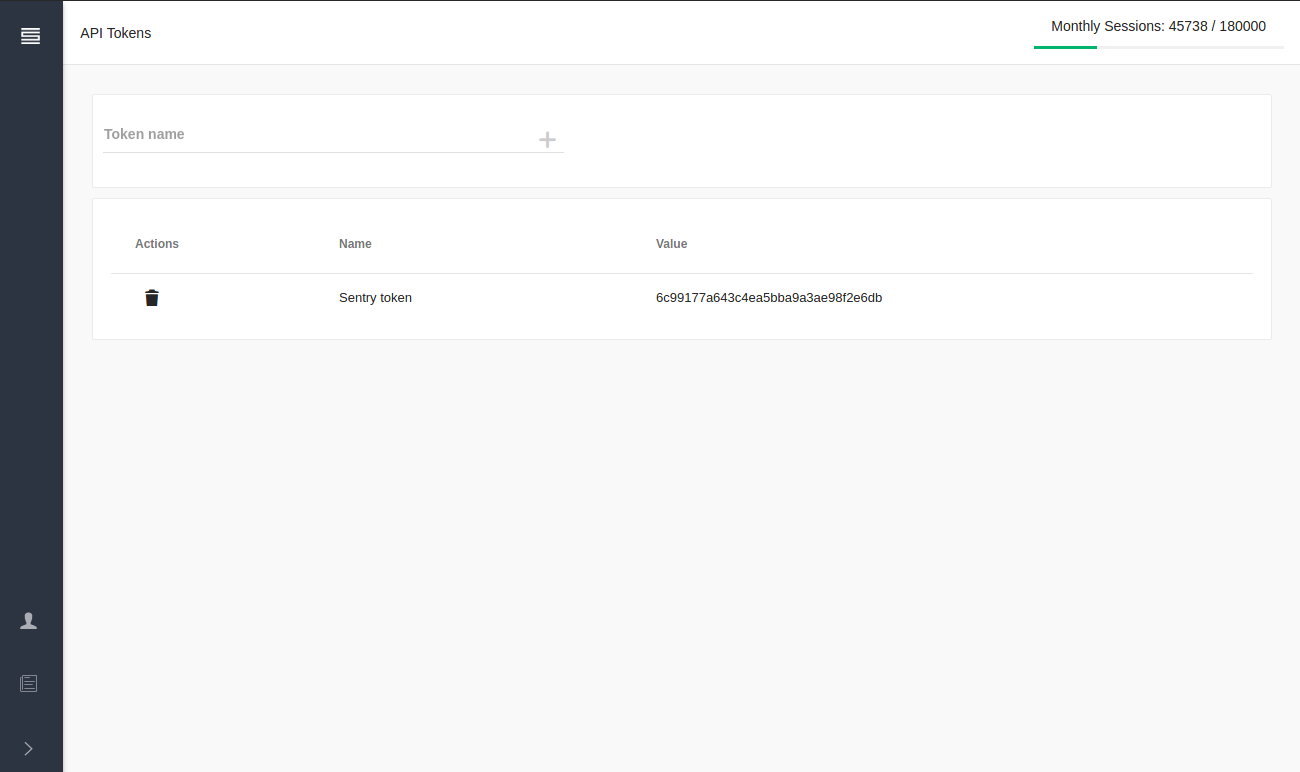
Go to the API Tokens page, enter a name for the token (e.g. Sentry token) in the input field and create a new token:
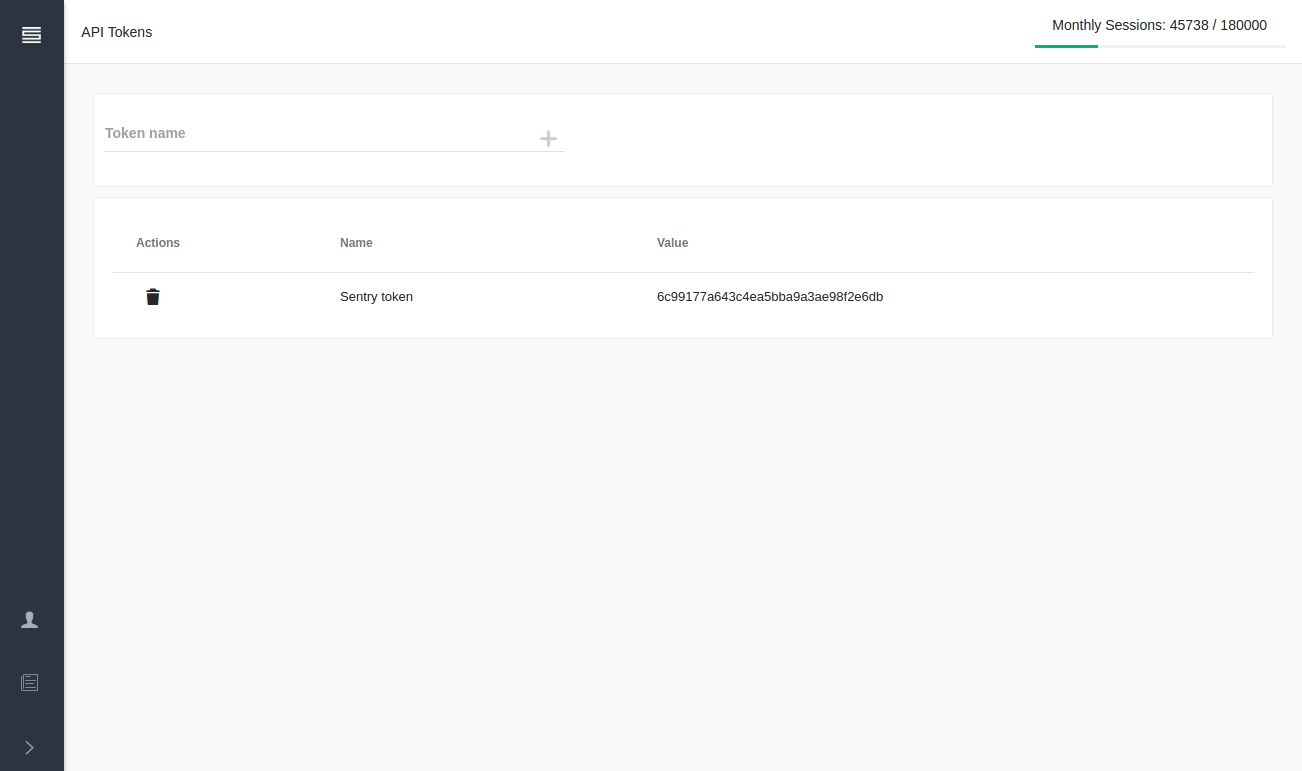
NoteThe name is required only so you can identify and manage your API tokens. Anytime you think the security is compromised you can delete the relevant API token and create a new one.
Configuring the plugin
The final step is to configure the plugin. Go to the settings of your project in Sentry. Find the SessionStack plugin in the integrations page and click on Configure plugin. You’ll have to enter the email of your SessionStack user account, the API Token and the ID of the project.
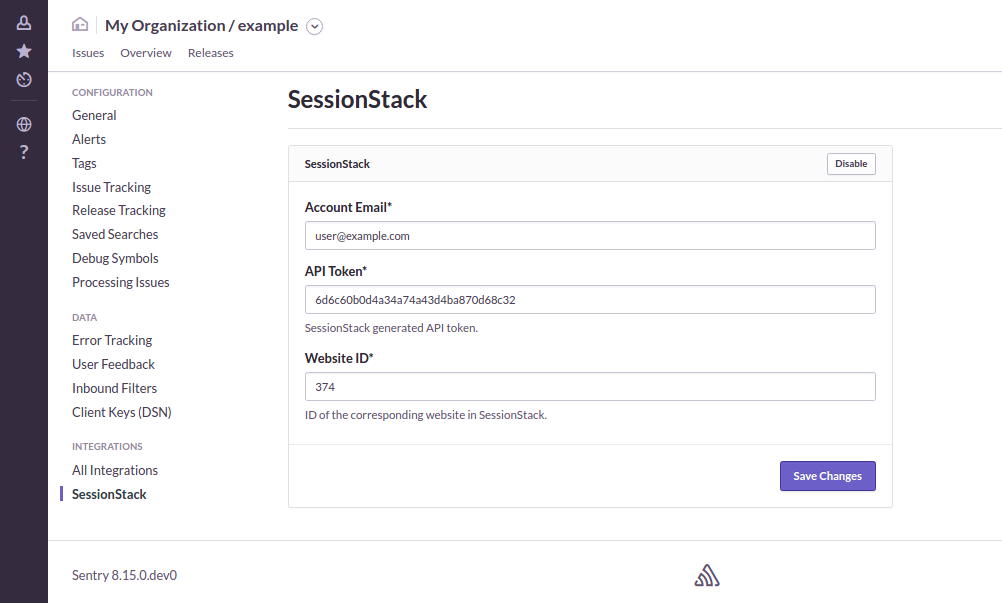
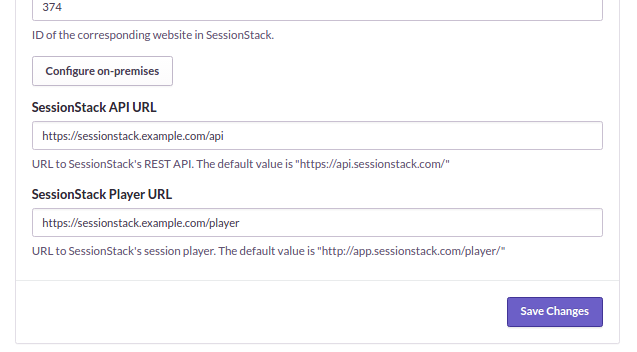
If you’re using on-premises deployment of Sentry you can also configure the proper REST API and session player addresses of your SessionStack deployment.
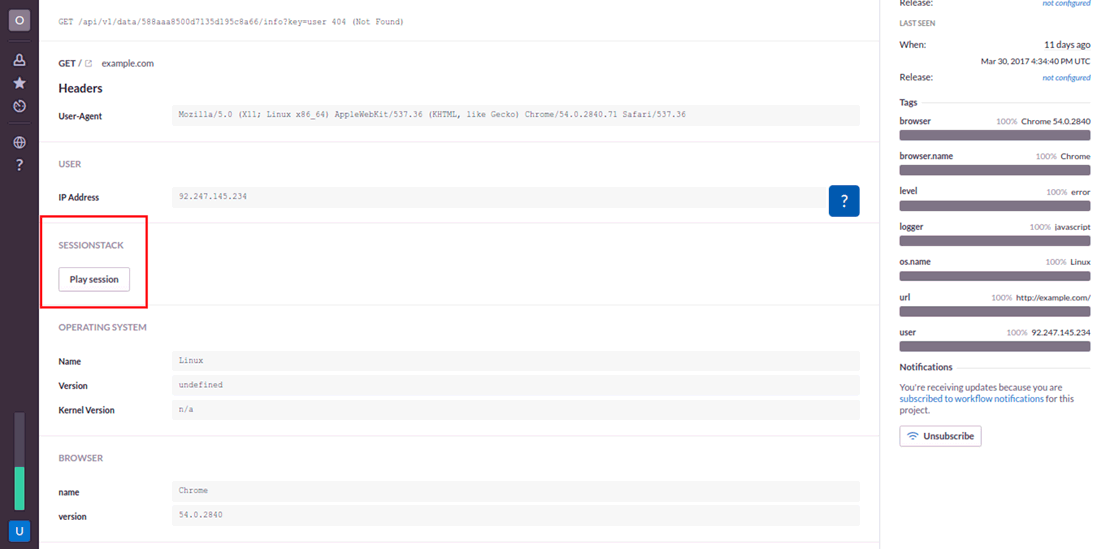
Now when you go to your Sentry reports you’ll find a Play Session button.
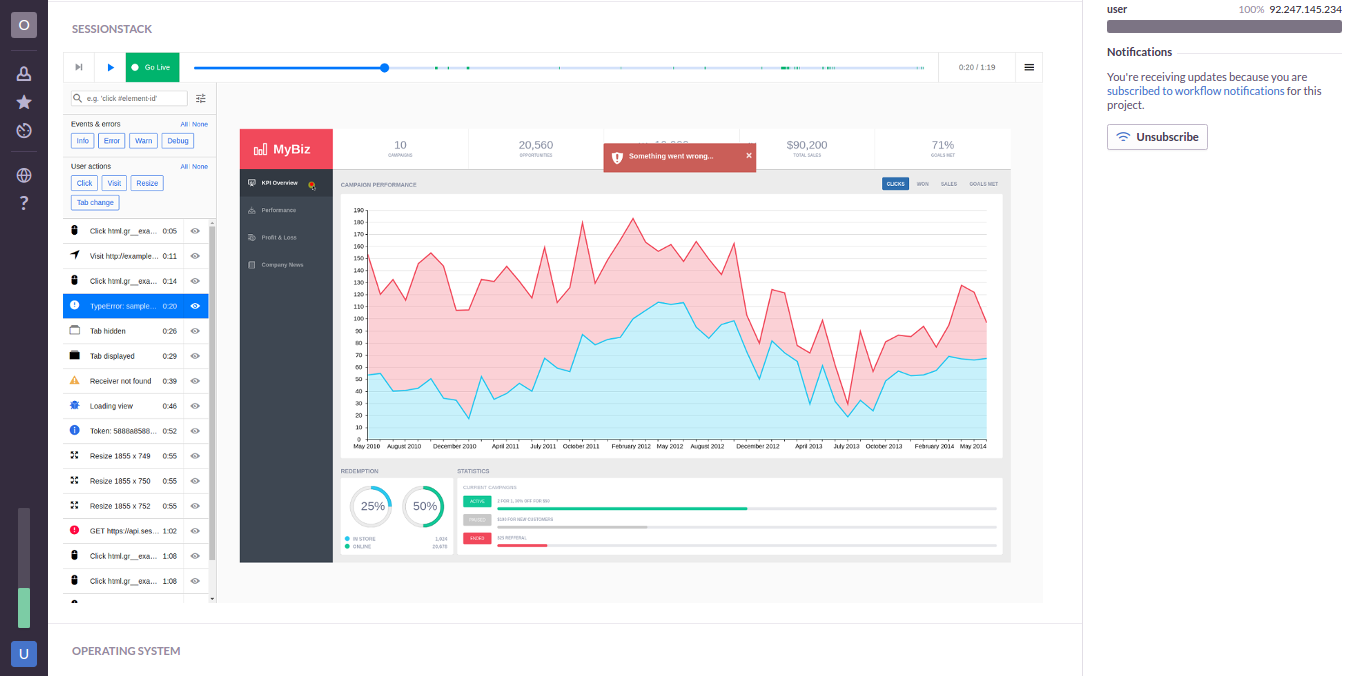
Clicking on it will open up the recorded session and will start playing 5 seconds before the event has occurred so you can see the user behavior that lead to it.
Updated 4 months ago
